
Hello and welcome to my huge ‘getting ready with Bethany’ makeup post! I am in no way a beauty blogger, so this post is purely to satisfy any curiosity you have about my makeup regime. I’m not an expert, I don’t have the best brushes or techniques, but this is what I use on my face, and why.
FYI all of this is on my Snapchat story and will expire around lunchtime on 13th July!
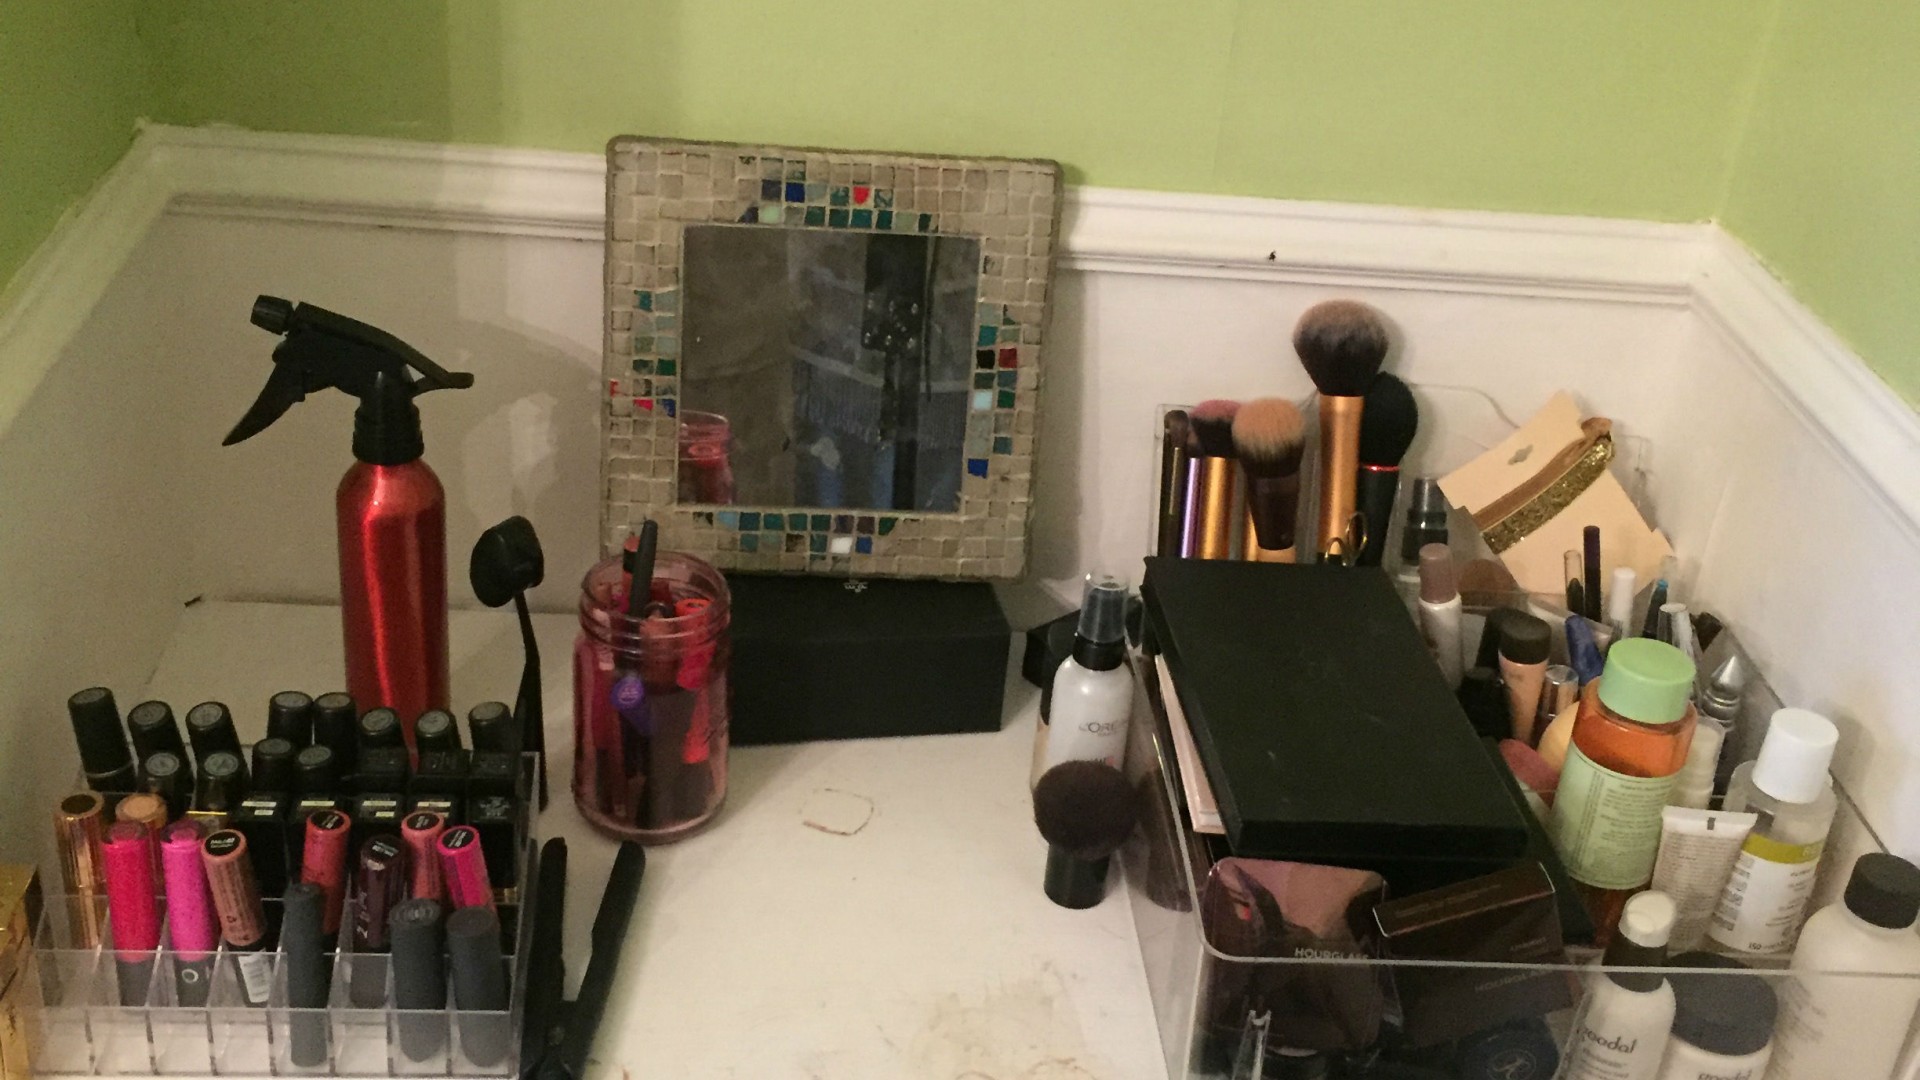
First up: this is where my makeup lives.

I use the Phytorain range from Goodal, which I got in Club Clio in NYC when it was on sale at 50% off. It’s been perfect for my skin and I really never want it to run out, a) because I paid so little for such great products and b) because it’s going to be hard to find, as well as expensive. It does an amazing job.

So here we begin, with my clean and moisturised face.

I prime my eyelids with Urban Decay Primer Potion. This has changed my makeup life: before I used this eyelid primer, I just wouldn’t bother wearing eyeshadow because it slid off so quickly and settled into the lines on my eyelids. Now my eye makeup stays all day, even when it’s a really bright, bold look.

For the purposes of this post, I decided to do my standard eye makeup look, which is a pale neutral on the lids and a brown buffed into the crease. I used Maybelline Colour Tattoo in Creme de Rose all over my lid, then covered it with the second from left shade on the bottom row of my beloved Smashbox Full Exposure mini palette. This palette has been revolutionary for me, as I had never used matte eyeshadows before I got this last year with some Boots points, and now I’m hooked. Most days my eyeshadow will be matte. I tend to use either of the two middle shades in the bottom row on my lid, and then whichever dark matte is next to them in my crease and on my outer eye for a subtle smoky look. So today, because I used the peachy colour, I put the dark brown on in the crease. The mini Full Exposure palette is perfect because it’s literally the size of a credit card and super slim so you can take it with you everywhere and know you’ll have 8 shadows to make a look from.

This is what it looks like when I’ve just got the Maybelline cream shadow as a base, then when I’ve put the two Smashbox powder shadows over the top.


Next up is mascara. I happily paid more for mascara in the past, but I got this one in a beauty box and have never looked back. I honestly think it works better than every other mascara I’ve ever used. I want a mascara that thickens, lengthens and darkens, and this does exactly that. Bourjois Volume 1 Seconde mascara is The One.

Here’s a photo where I have it on one set of lashes but not the other, and you can so clearly see the difference it makes.

Eye makeup done, it’s time for face makeup. I don’t use a primer, having never found one I really love, so I just go straight for foundation. I love Nars Sheer Glow foundation in Mont Blanc. I think Sheer Glow is a real misnomer because it gives full coverage and is not really sheer at all. I mix 2 parts foundation with one part MUA illuminator in Oyster, which is cheap and effective and getting my glow started.

As you can see, it really tones down my natural pinkness and creates a more uniform colour.

I don’t think my undereye circles are too bad but I always feel better with some concealer. I was using Benefit Fake Up until recently when a beauty blogger recommended Rimmel Match Perfection, so I gave it a go as part of Superdrug’s current 3 for 2 across cosmetics deal, and I’m sold. I apply it with the angled bit of this Make Up Revolution sponge, and it works really well.


Then I contour. I used to use the Topshop cream contour stick and just smudge it in with my fingers, but I got the Kevyn Aucoin Sculpting Powder last week and am totally sold. It mimics the coldness of real shadow and gives a really natural contour. I apply it with the tapered end of the Revlon contour brush and then just blend it in with the rest of the brush. It looks quite heavy in this photo but as you’ll see, once it’s blended and I have other makeup on, it’s really seamless.


I always apply my highlighter next, as I think blusher looks better on top of highlighter rather than the other way around. I’m obsessed with my Anastasia Beverly Hills Glow Kit in Sun Dipped, and today I’m just wearing the pretty Champagne-toned shade Moonstone, whereas I usually use Moonstone with Summer over the top on the highest points of my cheeks. I apply it with a big, dense fluffy brush and blend it out with a stippling brush.


Next up is blusher. I was using a Bourjois blusher in Rose d’Or which was fine but nothing special, and I wanted to find something special. I could have repurchased Nars Orgasm blusher but I decided to deviate, and went for Hourglass. This is their Ambient Lighting Blusher in Diffused Heat, and it’s beautiful. It’s warming and glowy without being too much. It’s so finely-milled and easy to apply, and I’m so happy with it. I apply it with a Real Techniques Buffing Brush.


Even though I’m not through with my makeup, I apply my finishing powder now so it doesn’t disrupt my brows and lips. I would never wear a matte finishing powder, but discovering the Hourglass Ambient Lighting Powder has been a godsend. I think of all the makeup I’ve bought in the past couple of years, this has made the most difference to my overall look. I swipe it all over my face with a kabuki brush (I use MAC 182), and it instantly gives me that super photogenic glow.

Don’t I look better already?

Nearly done! It’s brow time. I am truly in love with Anastasia Beverly Hills Dip Brow pomade in Ebony. It darkens my eyebrows, fills them out where they’re uneven, and allows me to extend them so they’re super elegant. I’ve had this pot for 2 years and it’s still probably got another year left in is. I cannot praise this product enough. Benefit’s new Ka-Brow is similar, and has the advantage of a built-in brush, but nothing comes close to Dip Brow’s effectiveness. I apply it with a hard-angle brush, this one’s Real Techniques.


And I finish everything off with a coat of lipstick. For this post I decided to wear my all-time favourite lipstick: Kat Von D’s liquid lipstick in Double Dare, which is described on Sephora as a ‘cocoa blush’ which I think is quite accurate. I stumbled across this shade totally by accident- when I was colour-matched to a foundation in Sephora in Philadelphia, I just wanted any random lipstick to see if the foundation looked right with a full makeup look, so I picked up the first thing I saw, which was Double Dare. Since then, I’ve been hooked. A decent dupe for the colour, if not the formula, is Exotic from NYX’s Lip Lingerie range. As far as I know, until KVD launches in Debenhams this autumn, there’s no UK stockist for Double Dare.


So there you have it! That’s my typical makeup look. I don’t vary the products I use on my face and eyebrows at all, really, and it’s just my eyeshadow/liner and lipstick that changes day to day. If you have any questions, just tweet me.
One Reply to “skin deep.”